RSS

Monthly Archives: March 2012

Sketchbook

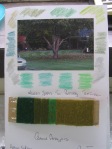
This time I will try another sample of colour analysis from a photograph.

The season being autumn I have chosen some lesser than warm colours in various shades and tones of green. These green colours are both ends of the spectrum that is blue/green and yellow/green.The photo has a matt finish to it so that the greens are more muted and dull looking than than they appear in natural day light. Not only have I used water coloured paints but also snippets of images from coloured magazines and yarn wound onto cardboard in approximately the same proportions as in the photo to show the relationship between the photo and the materials.

Water colours have a serenity about them when being applied which helps me to develop a fairly standard format as suggested in the lessons but I want to vary my way of analysing colour perhaps by trying a drawing/sketch and using a variety of materials and fibres.

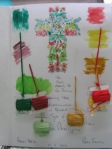
Still with the autumn shades but introducing some warmer colours such as red and yellow. By taking a series of flower shapes and sketching them in pencil I added the full strength colours from water coloured paints. The slender and spindly lines suggests I use a lower denier of thread and I have chosen DMC thread shades which match the colours in the drawing. The warm reds and yellows contrast strongly with the cool greens and all their different tones. The duller greens stand out in intensity because of their clean cut lines, especially their outlines and hash texture markings. The greens appear darker because of the value of the yellow and reds surrounding them.

I tend to work intuitively rather than by analysis of the concepts of colour and techniques other than collage. It still is and will for some time yet be a voyage of discovery for me as a student. I hope that I never stop learning something new.

 
Comments Off on Sketchbook

Posted by on March 15, 2012 in Sketchbook


Part Four: Project Eight – Stage Two. Exercise Four.

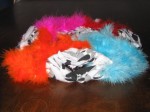
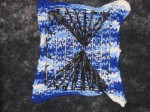
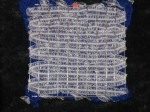
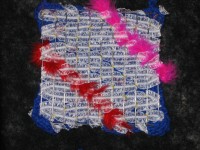
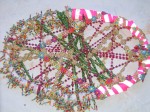
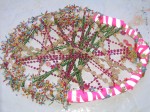
Following the instruction  “start with rigid materials” to the letter,I went looking for a recycled  wire bird-cage, thinking that it had a variation of rigid wire sides which I could adapt to using for ‘trellis type weaving’. I ended up with various other wire framed trellis’ which I used for filling in the spaces to create solid and open areas – photos of  samples herewith.

All samples have been worked randomly with no specific design in mind – as the imagination took me so the weaving took shape. The preset pattern of the wires did dictate to an extent the outcome of the weaving of the fibres. Colours were important in that they gave the image vibrant appeal. Not just yarns but more outlandish material was used such as faux fur with a strong cord running through its fibres. This meant that it was able to be threaded through the wires and also secured by hand stitching.

The background in two of the samples was knitted patterns of Peggy squares. I have the sense that my samples are not in keeping with those in the manual on page 168 (my numbering) and that I would like to try less rigid forms of the template and perhaps ‘pig intestines’ which if placed in a set format will stay fixed when the animal intestines dry. I am thinking that I want to try some other forms of structures to broaden my experience of this exercise.

 
Comments Off on Part Four: Project Eight – Stage Two. Exercise Four.

Posted by on March 11, 2012 in Part Four: Project Eight - Stage Two. Exercise 4.


Part Four: Project Eight – Stage Two. Exercise Three

I see these exercises as craft based rather than telling a story. Saying that however discounts the fact that these pieces were not worked to a predefined pattern or kit that some one else had designed. They were merely ‘suck and see’ tasks: decide on a shape – oval. Use more rigid materials: bamboo bag handles parcel taped end to end. Think of the effect of light and space: interwoven yarns and fibres so that there were spaces where the light could shine through and the background could be seen between the materials. I should have photographed the object up against a black wall for a more tenacious visual impression.

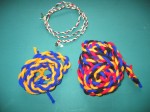
A different material such as hemp or flax or rope may have resulted in a better outcome for the ‘making a rope’ experiment’. The outcome helped me to understand the technique but the use of plastic covered wire did not allow the cord when released to twist back on itself ending up in a compact object.

I prefer to work from a visual source so that there is something to focus on and proceed towards. Using the imagination is a creative process in itself which draws on the background and experiences stored away in ones sub conscious. These exercise are a means to an end and that is the satisfaction that comes from persevering with the various techniques. To develop these tasks further colour, pattern, shape and organisation must be considered in order to raise the effort to that which has aesthetic appeal as well as the “WOW” factor.

 
Comments Off on Part Four: Project Eight – Stage Two. Exercise Three

Posted by on March 9, 2012 in Part Four: Project Eight - Stage Two. Exercise 3.


Part Four: Project Eight – Stage Two. Exercise Two.

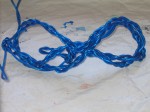
Just the like the best shot in golf – I want to keep going back again and again and again. Very colourful but becomes more expressive as a larger sized cord is used and the fingers become quite nimble. Must try other materials the resulting textures and structures will be so exciting and pleasing to do.

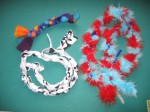
Playing with yarns fibres and fabric are exciting even if it takes two or three tries at getting compatibility between the different textile mediums. Plaiting become second nature because the pattern is repetitive even if it is hard on the back and concentration. Plenty of ‘get up and walk around’ helped to relieve the tension in the shoulders. Colourful aren’t they – primary of course and also the code colours of our regional rugby team. Fir up the nose leads to ‘ticklish’ behaviour – such as sneezing.

Repetition in the technique takes away some of the excitement and anxiety when working towards resolving a piece of work. It would seem that these constructions may not be the end in themselves so much as a means to an end. Once learned however the techniques become a resource stored within ones data base for later consummation.

 
Comments Off on Part Four: Project Eight – Stage Two. Exercise Two.

Posted by on March 6, 2012 in Part Four: Project Eight - Stage Two. Exercise 2.


Part Four: Introduction.

WOVEN STRUCTURES

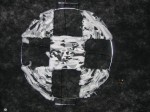
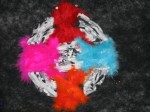
Who ever thought that recycled materials such as sewing machine cords, armature wire, duck fabric and screen printing would make up so divinely. Not all materials are textile but the overall design and artistic piece invites variable comments from viewers when discovered on my studio wall.

This was purely an experimental object with the intention of using some off-beat and discarded sewing machine unrepairable items. The screen printing was applied to a piece of ‘duck’ fabric and stuck onto a section of fabric cardboard cylinder. Because the machine flex was not stripped down to the actual wires the weaving has ended up as being open and distended.

There are many techniques and complexity’s just waiting to be discovered in my workshop basement when I look for alternative materials that can be manipulated with some other forms of artistry.

 
Comments Off on Part Four: Introduction.

Posted by on March 5, 2012 in Part Four: Introduction.


Part Four: Project Eight – Stage Two. Exercise One.

Experimenting with structures.


There is some satisfaction in going back and using some earlier visual source material in that it not only reduces the great volume of work that has been filed but gives it a degree of usefulness. In fact all three samples have some positive elements about each one. The technique is pretty much ‘craft work’ but the outcomes can be seen as a positive construct. The first sample has movement because the outlines and edges to the base material are curved and just not straight and parallel with one another.The second sample has colour and shape because the pattern is just not all made up of squares it also has rectangles. The third sample has a congestion of colour on the right hand side whereas the gold and the black/blue really enhance the visual effect of the overall design. This exercise could have a real sense of resolution once the development stages are progressed.

Varying the size and shape of the strips makes for a more interesting visual piece as does using a variation of materials. To experiment further by working with more open spaces within the design would help to prevent some of the congestion sensations as a result of bordering once strip up against another. Less rather than more would be the next step.

 
Comments Off on Part Four: Project Eight – Stage Two. Exercise One.

Posted by on March 5, 2012 in Part Four: Project Eight - Stage Two. Exercise 1.


Part Four: Project Eight – Stage One.

Exploring the qualities of yarn.

Hours of ‘just looking thankyou’ in wool barns and ‘op-shops’ to build up supply’s of wool,yarns, natural, man-made and regenerated fibres.

A hunt around has produced some oddities such as armature wire, raffia, plastic covered wire, binder twine and knitted and crocheted garments for unpicking.

There is a down side to the collection of quantities of various weights and types of yarns not only as far as the expense is involved but also the storing and identifying of each item for later retrieval. Knowing where to obtain such materials is important if and when required for later use whether it be from specialist shops or by mail order. The secret is to know what the user will require for a specific project so that it can be obtained in sufficient quantity before hand avoiding the problem of not either having enough or the supplier ‘has since closed down’.

 
Comments Off on Part Four: Project Eight – Stage One.

Posted by on March 5, 2012 in Part Four: Project Eight - Stage One.


Part Four: Project Eight – About Weaving (Tapestry)

1st March 2012

I have a need to feel grounded at the moment and to put some evidence of my work up for viewing and confirmation that I have been doing something. This image is of two quilts which I have no further use for cut up into 3″ strips and woven together indiscriminately. I quite like it. They can be dismantled and rewoven as they have not been sewn down/together. The photos show three variations of the same two quilts. These have a 2 and 3 dimension to them apart from being of some practical use as bed spreads. The depth and thickness of the polar fleece made from a blend of wool and polyester provides warmth to the user and pleasure to the viewer when woven in linear segments. Variations to the patterns can be achieved by changing the shape of the cut pieces so that once woven together they will create other visual impressions. The bright colours help to create a more sensual effect when viewed up close. Because they are principally primary colours there is an abruptness to the colour changes where each segment meets. The textural nature of the materials used also contribute to tactile sensations of softness and gentleness. Rather than stick to the conformity of over warp and under weave and visa versa I set about changing the up and over style of weaving. I moved into pipe cleaners, faux fir and binder twine. I even cut up some voiles and wove that into the piece but it was too flimsy and really only brought about a colour change. Being black it really highlighted the brilliant colour of the faux fir – Bright orange.

19th March 2012

Getting prepared meant asking for a loan of a frame from the local guild. The only size available was a 50cm X 75cm frame but with small nails inserted in the head and base boards at the required distance apart. This solved a problem for me of shifting warp threads and I ended up with 44 in total.

Starting with 4 ply knitting yarn was a breeze until 20cm of woven fibres and yarns left me wondering what I was going to do with the excess yarn left outside the frame when starting and finishing each section of pattern/yarn. I had forgotten to weave the ends into the warp thinking that I would simply knot the ends at the right side. After spending a day on weaving the loose ends back into the warp I felt justified in saying that now I really have some texture to the woven wools. Weaving standard knitting wool meant that the piece was tidy neatly patterned and had a touch of satisfaction to it. But it was very structured, bland and uninteresting. By changing to carpet yarns and cut up acrylic fabric it started to take on its own personality, the parallel lines started to meander, move away from the horizontal and left me wanting to run my hands over it to experience the thrill of the softness and roughness of each type of fabric, yarn and fibre.

I have to be honest and say up to now this was my interpretation of what I was being ask to do in this lesson. I don’t have a problem with it but then mine is not a practiced eye and being the first time everything was pretty amazing colour wise, pattern wise, structure, texture and organisation. The materials were what I had on hand rather than going out and buying in new stuff. However in saying that I recognise that perhaps the warp threads should not be so obvious, colour changes not so severe and organisation –  well it was mostly intuitive – certainly not a pre arranged design. If I had had an idea in mind plus a theme plus some development stages then it would have been according to hoile – not so – I think its terrific as a visual creation of my choosing.

Turned the frame up side down and started weaving from the other end so that the first lot of weaving did not have to be cut from the frame.

Moving on to curved wefts, soumak and ghiordes knots took a bit of thinking about. These techniques produced another example of texture and patterned weaving. Because the earlier samples were mainly with knitting wool and non standard fibres such as twine I chose to use curtain chords and strips of fabric as a variation. The thicker cords were able to be seen more easily because they bulked up but the flimsy fashion fabrics became lost in between the warp threads when being compacted as they were pushed up against other threads.

Curtain cord is quite thick and already platted in the winding process. Leaves a brilliant texture when the soumak knot is cut leaving a pile on the surface of the warp threads. But if cut too short it unwinds and if trying to create loop pile unravels – so that was successful and not so successful. Again the colours are important they aluminate and accentuate the weaving process. But the warp threads are showing because the thick cord does not close up leaving gaps between the weft threads.

Introducing supermarket plastic bags, raffia, curtain cord and cut ghiordes knots.

perseverance has paid off. Because I have used a frame bigger than that suggested in the notes I have combined many of the tasks on one frame that is threads, fibres, materials and techniques. Everything has been a new experience, tedious at times and illuminating at other. The major problems I have encountered as I see it was the warp threads being far too obvious in and around the weaving. Every thing I have learned so far is associated with basic weaving but with unusual textiles which have contributed to a variation in outcomes especially texture and colour even if there were some unexpected outcomes.. I now have a foundation on which I can build with energy and creative deliberation.

 
Comments Off on Part Four: Project Eight – About Weaving (Tapestry)

Posted by on March 4, 2012 in Part Four: Project Eight - About Weaving Tapestry