BRIEF:
(1) Design & make a textile piece of my own;
(2) that could be part of a larger piece;
(3) using ideas from previous exercises;
(4) possibly combining techniques;
(5) providing an overview of all the (design) elements, integrated to form a dynamic relationship with each other;
(6) the completion of an end product is not required;
(7) consider size, purpose, function, site specific, form and structure.
The starting point for part five after laying out all my samples, sketchbooks and drawings was contrived from assignment one ‘mark-making’.
I started by using the idea of ‘mind mapping’ (see working notebook) to isolate and record my initial thinking as I worked through each of my folders.
In the first instance I used the ‘mark-making’ exercises 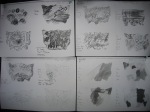 worked with pen, pencil and charcoal, moving on to mark-making in colour with gouache paints and free-hand machine embroidery using solvy and discarded sewing threads. The flash from the camera has produced a differentiated texture and a light and dark structure.The types of marks made on the paper limited this exercise to the medium I was using. I fully intended to follow this process through to a state of exhaustion knowing that I had other source material and tools I could use if the above proved unsatisfactory.
Depending on the distance that I was viewing the mark-making from and although the pencil is a versatile medium it lacked the impact that the charcoal could provide. Because the pencil is a linear medium, even when working fast it took time to build up density. Graphite/charcoal sticks/soft pencils proved to be quicker when used broadly and especially when using the sides of the medium. Unusual textures add character to mark-making for example when using frottage, various types of paint, sewing thread and wool felt. Photographs and photo copies lack the detail available by close inspection of the real thing unless notes are recorded at the time of the image being drawn.For this reason my choice of resource material would have benefited from visual and tactile sensations so that having been experienced first hand could have helped to demonstrate better the character of the materials.
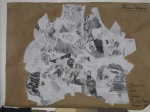
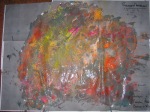
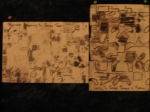
Herewith “two large drawings” one by way of cut up and woven collage and the other a selection of chalk dust scattered on to a mixture of fabric paint and PVC to form an abstract rendition of the woven collage void of the black and white tonings and converted into a colorization abstract.
My preference was to weave together various design ideas from my ‘mark-making’ source material.There was part of me which said give it my best shot and see what evolves. I was using the suggestion made in the lesson notes that “this process continues through further stages of selection, development and evaluation until you arrive at a coherent workable idea, ready to be realised as an end-product.” The texture of the mark-making was visual and tactile in that the thin and thick strokes of the pencil could be seen and the dust of the charcoal could be felt with the finger tips as they were rubbed across the medium. These textures will be entirely different to those in the next stage of the design process where the images will be converted into a textile medium. This will be a process of interpretation rather than imitation. The reproduction of the textures in the paper woven tapestry by drawing and painting sharpens observation and enhances perception of the image. The overall effect of its form and shape however is secondary to an organic object.
Once I had cut up and re-assembled the ‘mark-making’ images I looked for design elements such as shape and form in the woven sample. My objective was to make a number of drawings and samples and be open to any alternative strong emerging ideas. (See sketchbook)
2/5/2012
I am asking myself why am I hesitant about my source material being of an abstract nature. The answer is because I have yet to see the results of the process of weaving the cut strips together.
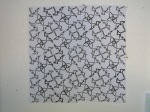
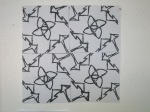
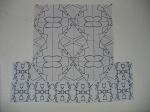
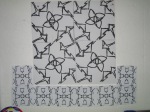
Using tracing paper I traced off a variation of shapes and objects from the rearranged and woven images of my original ‘mark-making’ exercises. I then cut out selected areas from each separate tracing and superimposed them one on top of the other to create a further rendition of the original paper tapestry. I have used out of focus photos so that the stark black lines/marks merge and fuse together to create an overall textural impression rather than perfect and clean outlines of the original shapes and forms. This will virtually eliminate hard lines helping the eye to see through rather than at the images.
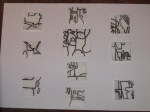
I then cut up 5cm squares of tracing paper and traced off a number of segments from the combined sheets of images so that each sample had a further series of different markings. (An alternative way to capturing segments of the tapestry is to cut out a 5cm X 5cm square window from cardboard and draw another copy of the markings that can be seen in the window). I then turned them over and penned the marks showing through on the back in black pen exactly as they were on the front.
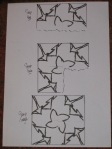
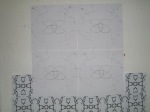
The next step was to take two photo copies of the front and back of each image making up a set of four. When placed side by side and because each quarter was a mirror image of the complementary quarter. I was very impressed and excited about the shapes, patterns and forms that were emerging from the source material as a result of the steps I was taking in the design process. I was able to end up with a series of slightly geometrical and symmetrical designs.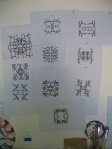
3/5/2012
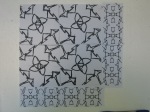
The excitement of being able to recognise shapes and pattern in the designs immediately threw up the idea of a wall hanging or lap quilt because many of the designs suggested border patterns or if enlarged the central medallion of a quilt.
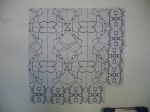
Off I raced, enlarging, cutting and pasting and putting together a design for a lap quilt from selected segments of the 5cm X 5cm designs. The possibilities were endless and the result, well not all that inspiring – requires some more thought put into it. 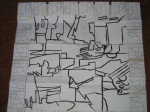 The centre medallion needed to be evaluated in terms of the design elements and the border needed to be continuous and flowing rather than a series of one-off segments of the same design.
Rather than placing all the individual designs in the centre another option would be to enlarge one design and use it as the medallion and then run another design around the outside as a border.
4/5/2012
The variations are many and will need to be manipulated to ensure an acceptable outcome before moving on to applying colours and materials to the design. The patterns need to flow by removing excess marks and lines that have no function. The overall effect must be in balance and uniform. The outlines of each pattern can be straight or linear for such techniques as applique but for hand trapunto quilting or machine quilting they would work better if rounded.
Re-worked one of the designs with more precision as to where the lines and patterns placed. It is now starting to look as if it is a better representation of the original. The process was by drawing, cutting and pasting on graph paper then enlarged and pasted into sequence as four quarters.
15/5/2012
More samples and redrawing parts of the various objects to achieve a better balance and less angles so that they appear less congested.
16/5/2012
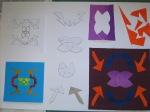
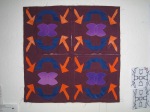
Introducing colour, making templates of the objects so that they can be cut out of ‘steam a seam’. The difference between ‘steam a seam’ and ‘vliesofix’ is that ‘steam a seam’ can be lifted up and repositioned.
17/5/2012
The steam a seam’ templates are then attached to the back of the selected fabric, cut out and placed on the right side of the base fabric after removing the layer of protection paper.
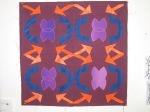
Because the four finished blocks have a 1/4″ seam around the design they can be pieced together to form one continuous block. This can be the finished centre medallion of a lap quilt, wall hanging, quilt etc., or more blocks can be added around with a border around the outside of all the blocks.
Finally the objects can be secured by a blanket stitch around each outline either by hand or machine.
21/5/2012
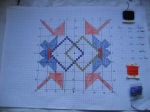
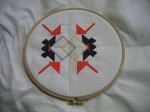
Redrafting the design on to graph paper meant that to meet the requirements of full and half stitch the squares on the graph had to be aligned to the original design. This meant that the design was not an exact replica of the original but kept the idea in tact so that the one block could be either duplicated or made into as many copies as required to finish the project whether it be a table-cloth, runner or framed as a wall hanging.
24/5/2012
14 count Aida cloth was used but the stitching needed to be over two squares to ensure a reasonable size block such as 16cm X 16cm. A finished project would be either twice, three or four times the size depending on what was being envisaged.
It could be made in to a table mat or wall hanging or even framed by adding another block on all four sides and another four blocks in each of the corners. The white background could be filled in with a neutral colour.
1st June 2012
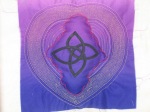
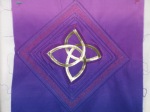
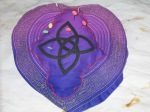
One of the samples has been made into a pin cushion. (on the right). The source material was modified a number of times, (see learning log and sketchbook for the process) with the final design using the traditional techniques of Italian corded work, Trapunto stuffed work, French cording and English quilting.
This would now need to be evaluated as to its quality of design, stitching and outcome. I am more than happy with the ‘final piece of my own’ because once I had progressed the design elements I felt I had achieved a minor goal towards fulfilling my ‘target piece’. I can see that parts of the stitching need to be secured better the central motif has some ‘kinks’ in it and the finishing work could be improved. The urge to improve the new techniques learned and to practice these skills has created a sense of having done well. I now want to document the steps in the process and build on the outcome by trying another design and perhaps a pillow or wall hanging.

You must be logged in to post a comment.